Table of Contents
CityTraffic Manual
CityTraffic is a plug-in for 3ds Max which helps to create car traffic flow on urban environments and off-roads. Special road editor and automatic cars setup substantially accelerates preparation of scenes for the simulation of traffic movement.
Huge variety of configurations for each car, whether it is adjustment of a suspension bracket or style of driving, give the ability to create realistic simulation. Dynamics calculation makes movements over complicated surfaces more realistic, and the artificial intelligent system helps cars to operate independently.
CityTraffic is an automatic traffic management system. Therefore, bringing the animation generated by the system to the forefront is not recommended.
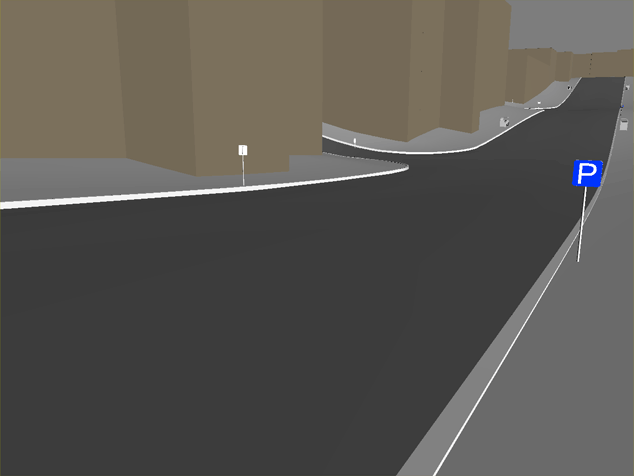
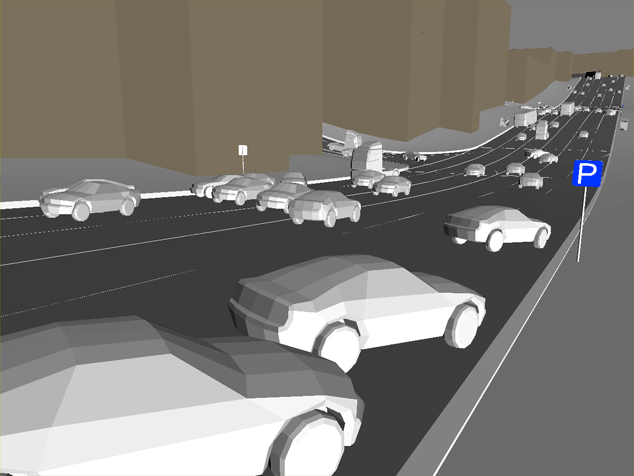
New features in version 2:
- New system of building road networks based on splines
- Automatic construction of standard intersections
- Advanced Artificial Intelligence for Vehicles
- More realistic behavior of traffic flow
- Increased speed of simulation calculation
- Six wheeled vehicle support
- Simplified system for cloning vehicles
- Simplified and expanded use of traffic lights function
- New objects are “speed limiter” “obstacle,” “stop line”
- Improved parking
- Improved suspension dynamics of vehicles
For owners of previouse versions
If you already use CityTraffic version 1.xx. CityTraffic 2 is essentially a brand new AI system, which differs radically from the one used in versions 1.xx. Besides, the whole road construction and traffic management algorithms have significantly changed. Hence, we have not been able to provide compatibility; thus, scenes created in versions 1.xx cannot be opened correctly in CityTraffic 2.
However, we have retained the possibility to install both CityTraffic 1.xx and CityTraffic 2 on the same version of 3ds Max. This will allow you to continue working on the files created in older versions and to switch to the new version step by step, whenever possible and necessary. The CityTraffic 1.xx license file will not work for CityTraffic 2, so you will need to request an additional license for CityTraffic 2. All CityTraffic 1.xx users will get the CityTraffic 2 licenses free of charge.
System requirements
3ds Max versions: 2009, 2010, 2011, 2012, 2013, 2014, 2015, 2016, 2017, 2018, 2019, 2020, 2021, 2022, 2023, 2024, 2025
3ds Max Design : all
OS: Windows XP, Windows Vista, Windows 7, 8, 10, 11
Microsoft Visual C++ 2010 Redistributable Package (probably already installed on your PC)
User must have local administrator rights on Windows XP.
Installation
Please make sure you downloaded latest version of the plug-in from our forum
Users are provided with the same installation file for both Workstation and Render node CityTraffic-x.xxx.exe
Workstation can be used only when license is properly installed, and provides access to all CityTraffic. options.
If CityTraffic. does not find license file it switches itself to Rendernode mode and only can open and render files created with CityTraffic Workstation.
Rendering is available both locally and over network.
To install the program you need to run the CityTraffic-x.xxx.exe with the administrator rights.
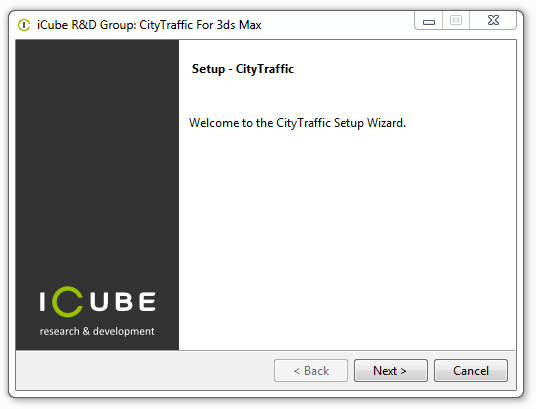
Don’t forget to quit 3ds max before you start the installation. (please check Task Manager too for any running instances of 3ds max from all users)
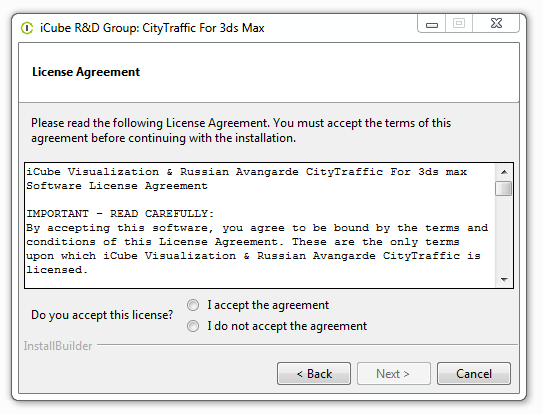
Read carefully the license agreement. If you accept it tick “I accept” and then press setup button; if not, press “Cancel” button.
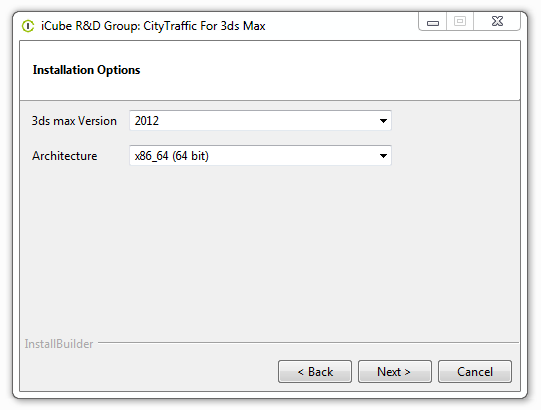
Choose 3ds max version you use.
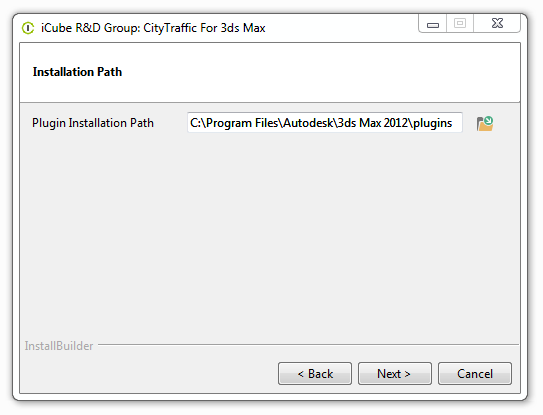
The setup wizard will automatically select destination folder for 3dsmax. Check the path where 3dsmax is installed and correct it if needed.
Registration
for activation instructions please see https://docs.icube3d.com/en:cerber-protection
Uninstall
you can find uninstaller in: Start menu > R&D Group > CItyTraffic > Uninstall
or manually delete CityTraffic2.dlo from Plugins folder in your 3ds max installation directory.
Installing for network or distributed rendering
For network rendering just install the same file CityTraffic-x.xxx.exe. Installation procedure is the same as for the Workstation, but skipping Registration process. Rendernodes do not require registration.
Submission for network or distributed rendering should be done from the PC with the registered version of CityTraffic. The rest of render nodes involved in the network or distributed rendering do not need to be registered
manual installation on render nodes: install 1 machine with the EXE file then copy \plugins\CityTraffic2.dlo to other rendernodes from that machine.
Step 1
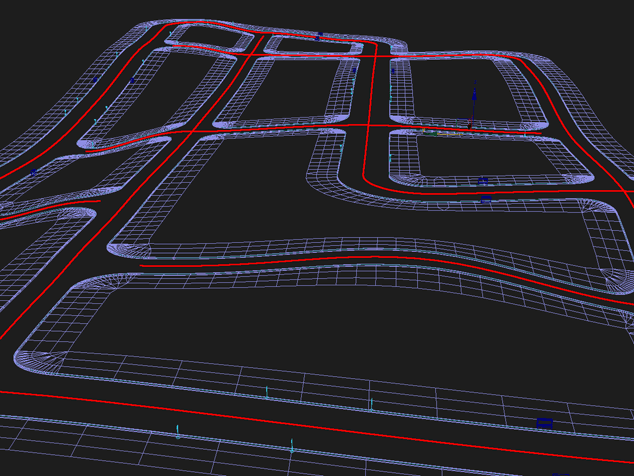
In the middle of each road draw a spline conforming to the terrain. Conforming does not have to be precise; however, the gap between the spline and the ground surface should not exceed the radius of your vehicles wheels. If roads vary in width or number of lanes, then each road type should have its own spline.
Step 2
Assign CityTraffic Road(WSM) modifier to splines.
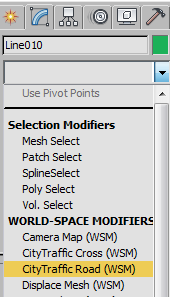
CityTraffic Road(WSM) modifier has the following parameters:
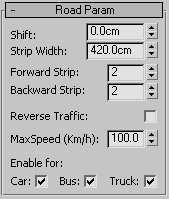
- Shift - shift of road centerlines against spline
- Strip Widh – lane width
- Forward Strip - number of forward lanes
- Backward Strip - number of backward lanes
- Reverse Traffic - reverse the direction of traffic
- MaxSpeed - speed limit for the road
- Enable for: - types of vehicles allowed on the road
If you need to create a road with lanes different in width or speed limit or reserved only for public transport, you can copy a spline, assign a CityTraffic Road(WSM) modifier with different parameters to the copy, and arrange the lanes in order by changing the Shift value. In this case, differently modified adjacent lanes should slightly overlap edgewise. This will allow vehicles to change lanes correctly.
Such a simple road modeling system by no means imply limited capability.
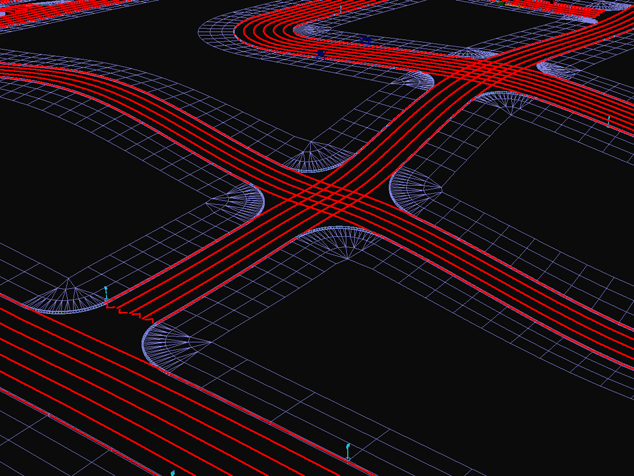
You can combine any part of the road from several splines with different CityTraffic Road(WSM) modifiers. This will allow to reduce or expand roads, create pullouts and parking bays, and so on. In order to make road narrowings and expansions look correct, you need to add extra elements to the relevant area. See below example
Step 3
To arrange road intersection, draw splines crossing the central lines of the roads to be intersected. While the shape of the splines does not matter, the intersecting points of the splines and the central lines are important.
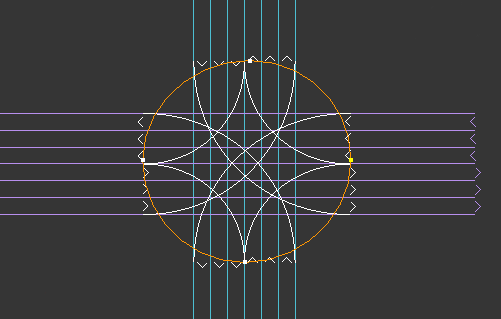
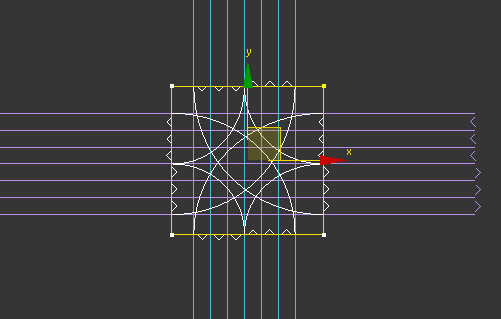
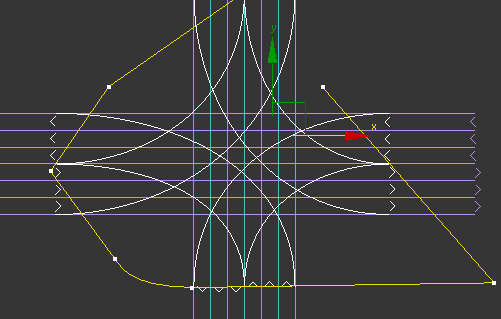
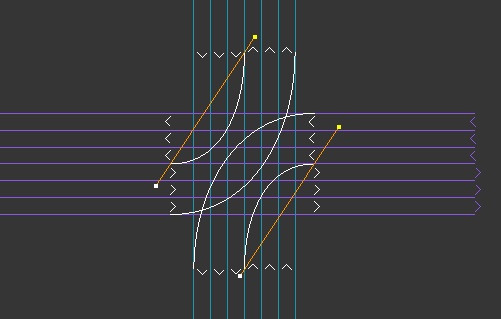
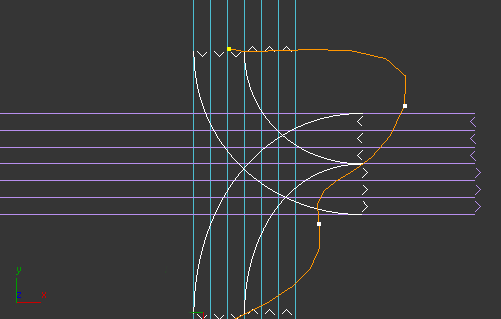
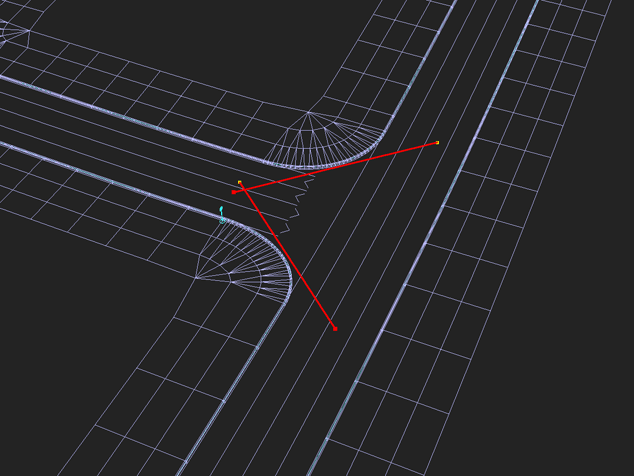
Assign a CityTraffic Cross (WSM) modifier to the spline.
road parameters
- Left Turn - left turn is allowed.
- Right Тurn - right turn is allowed.
- MaxSpeed – speed limit for the intersection.
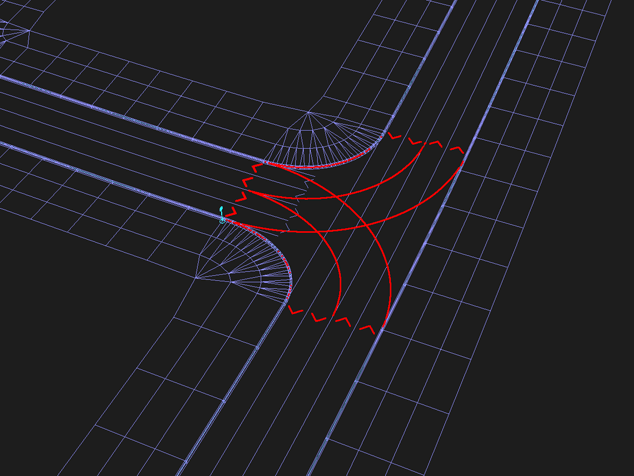
Arrange other intersections likewise.
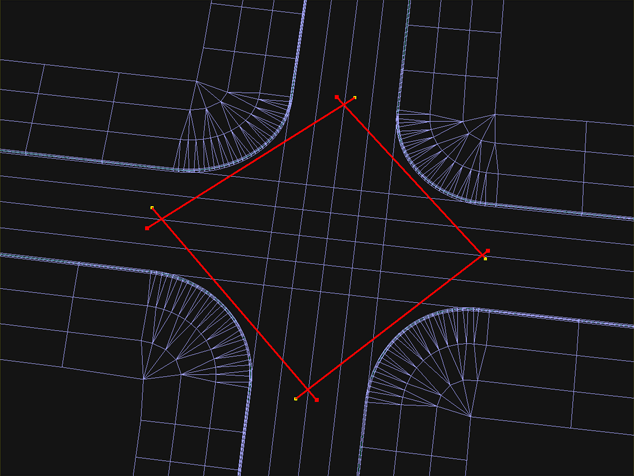
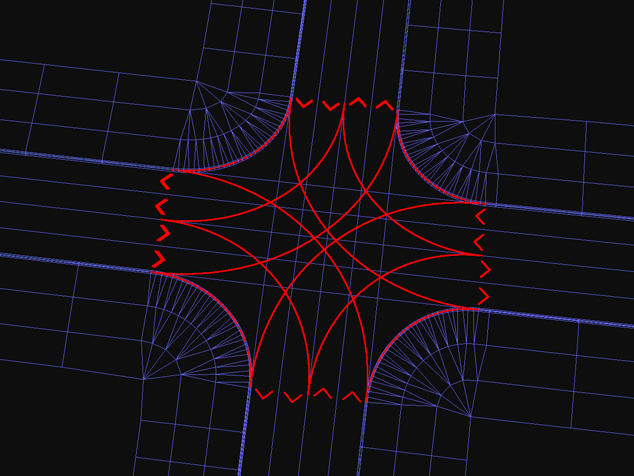
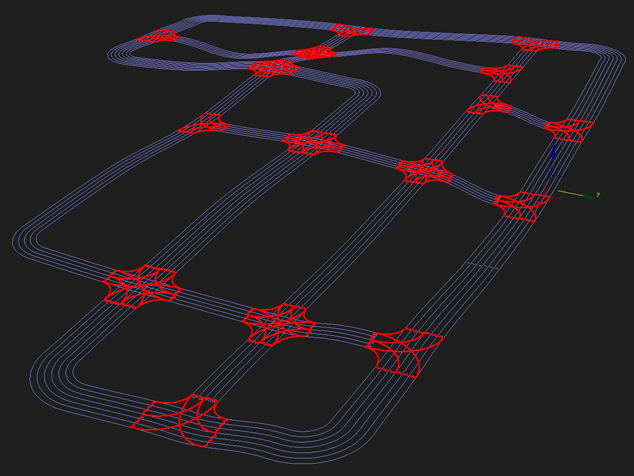
The automatic intersection modeling system makes it possible to quickly arrange numerous typical intersections. Nonetheless, it does not provide flexibility in managing traffic lanes, enabling turns from specific lanes, and making unusual radiuses and curves at intersections. If you are facing a task to develop an uncommon intersection, you need to do it manually. Draw all necessary traffic trajectories, turns and U-turns with splines, assign CityTraffic Road(WSM) modifier and transform the splines into road sections with necessary characteristics. Try to connect the spline edges to the adjacent to intersections road sectors accurately. However, they do not have to be perfectly precise as the system as such is intelligent enough to allocate traffic flows correctly.
Magic roundabout example
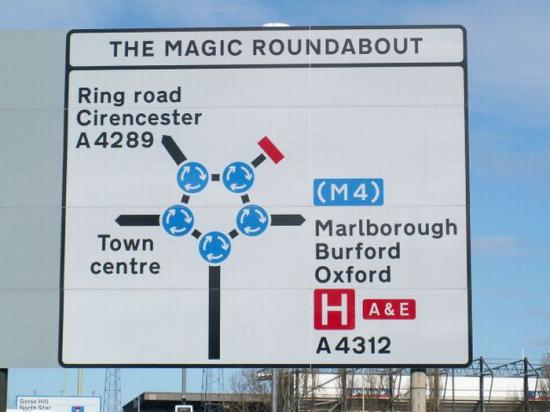
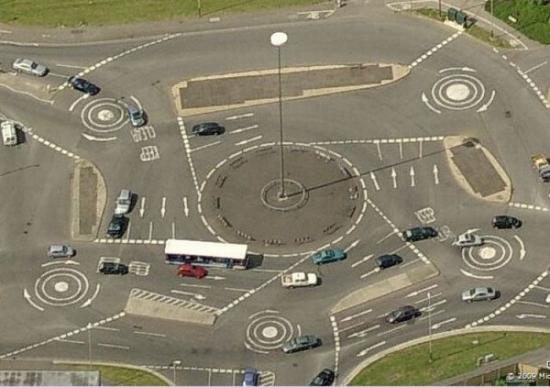
As an example lets analyze an extremely sophisticated intersection, i.e. the Magic Roundabout in Swindon, England, famous for its complexity. This is how it actually looks like:
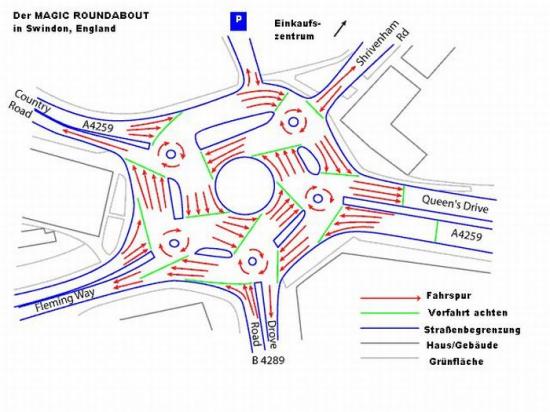
Here is its traffic plan:
a) Let’s start with modeling splines on all possible directions of the intersection; these do not have to be precise
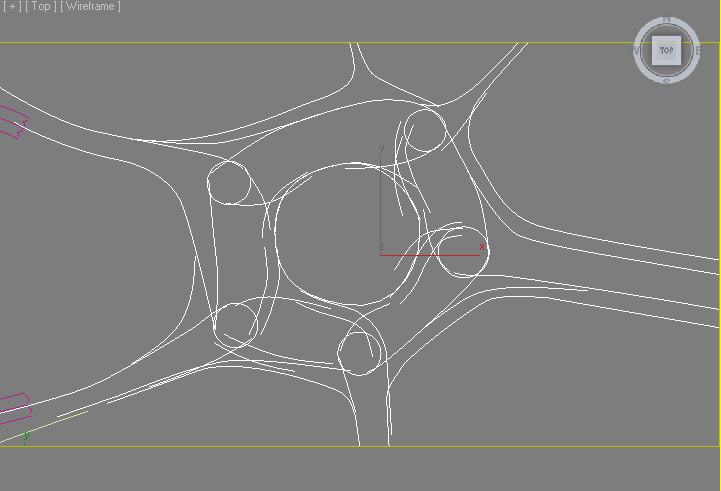
b) Then assign CityTraffic Road(WSM) modifiers to them and adjust the number of lanes and their widths. It is clear that there is no need to strive for perfect connections between all the elements.
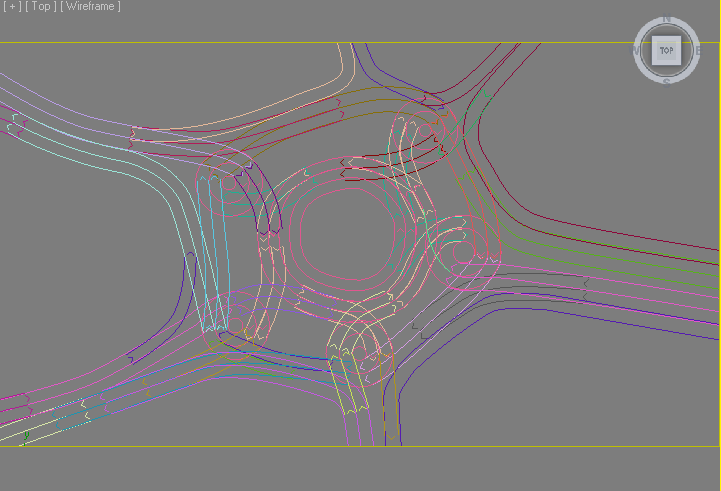
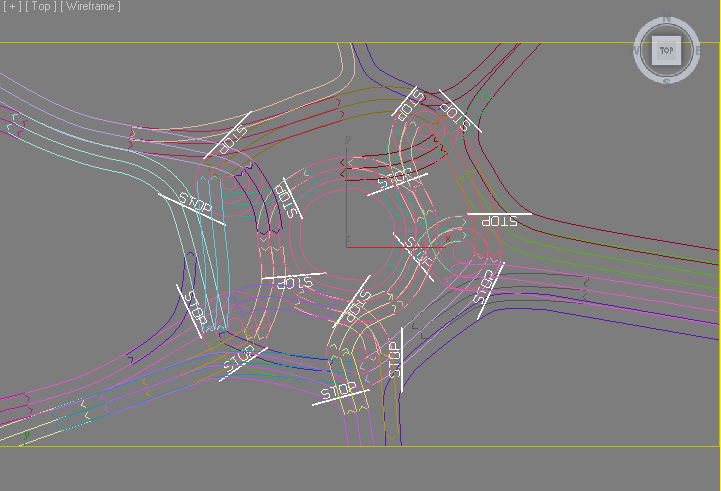
c) Arrange stop lines
d) Make simulation
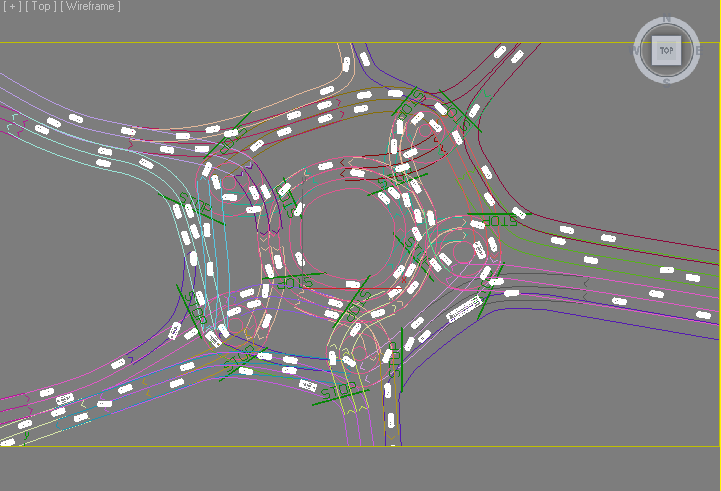
You can watch the result here: https://www.youtube.com/watch?v=conjlqsF7Ys
As you can see, even a complicated uncommon situation like this can be simulated with CityTraffic2.
Step 4
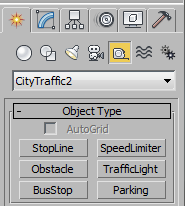
Arrange bus stops, parking bays, stop lines, and traffic lights where necessary. All these elements can be found in Helpers > CityTraffic2
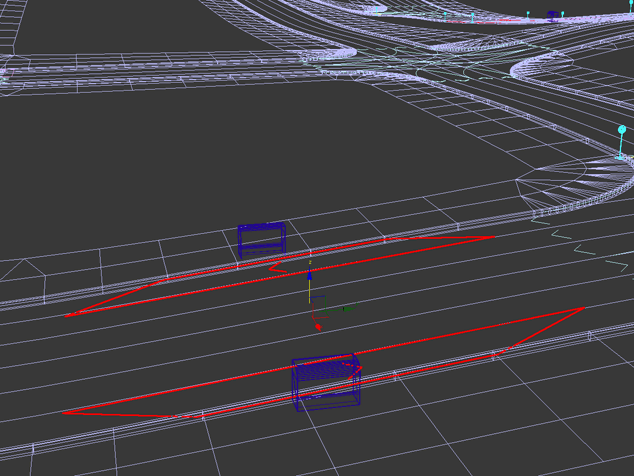
Bus Stops
BusStop

- Length - length of a bus stop
- Width - width of a bus stop
- Reverse - Changing direction for approaching bus stop
Buses will stop at this object.
Parking areas
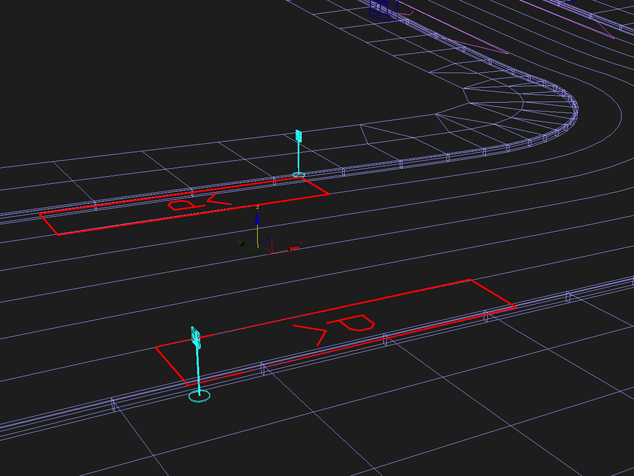
Parking
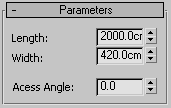
- Length – length of a parking area
- Width - width of a parking area
- Access Angle - value for cars to park at particular angle
Cars will park at this object.
Stop Lines
Stop Line

- Length - length of a stop line
- Width - width of a stop line
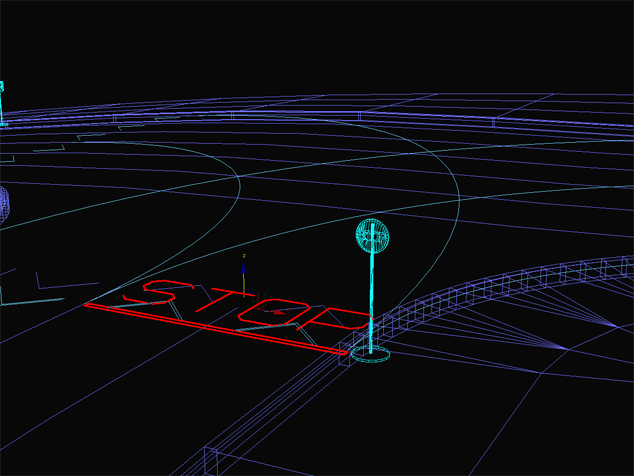
Do not make stop lines too small as they may be ignored. All vehicles will be slowing down and stopping prior to crossing this line. After stopping they will continue.
Obstacle
Obstacle

- Length - length of an obstacle
- Width - width of an obstacle
Vehicles cannot drive into obstacles, so they will be trying to detour them.
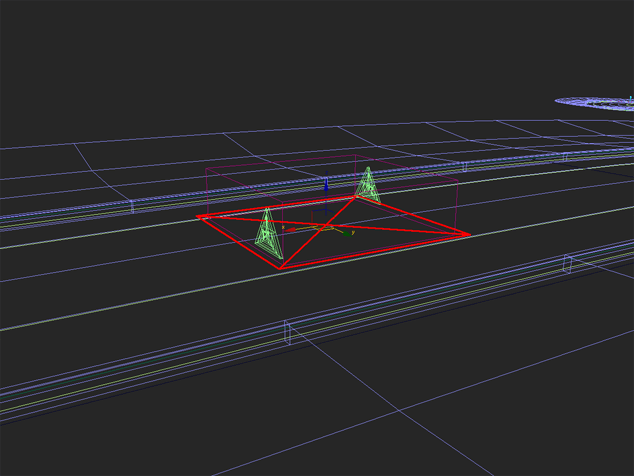
Do not make obstacles too small as they may be ignored
Speed Limiter
SpeedLimiter

- Length – length of a speed limiter
- Width – width of a speed limiter
- MaxSpeed - top speed on a limiter
This item can be used to decrease or increase the average speed of traffic flow on certain road sections, for example, to create speed bumps.

Do not make speed limiters too small as they may be ignored.
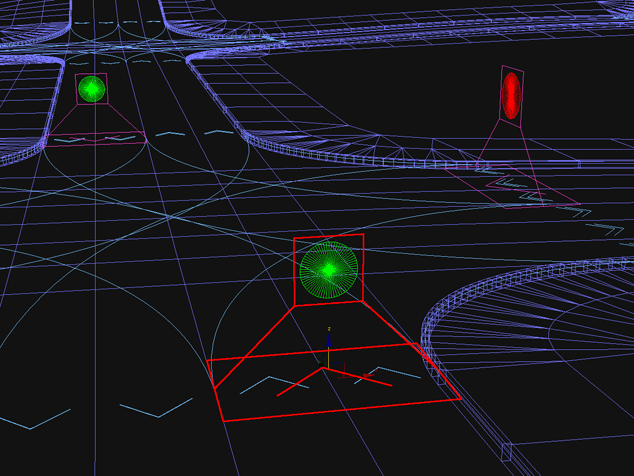
Traffic Lights
Traffic Light
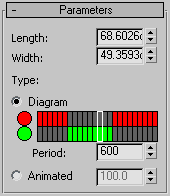
There are two ways to control traffic lights – with a diagram or animation parameter. In case of the diagram, the length of a period is defined by setting of a number of frames and assigning them permitted and non-permitted values. Alternatively, if the animated parameter is more than 50.0, then traffic lights allow traffic to proceed
- Length - length of traffic lights
- Width - width of traffic lights
Traffic lights impact the lanes they cover.
- Period – number of animated frames within which the behavior of traffic lights one-off time corresponds to
the diagram settings
Step 5
Apart from roads and road signs, you also need to configure vehicles. You can do it with CityTraffic2 utility.
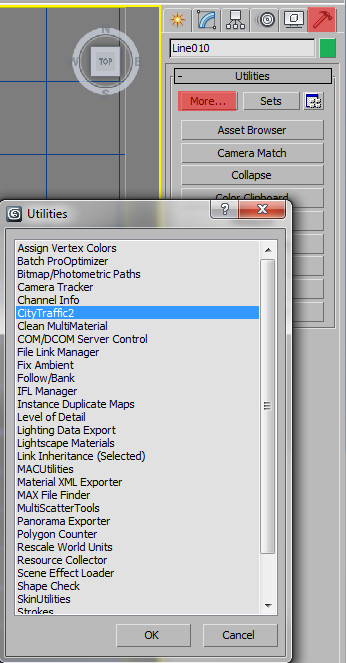
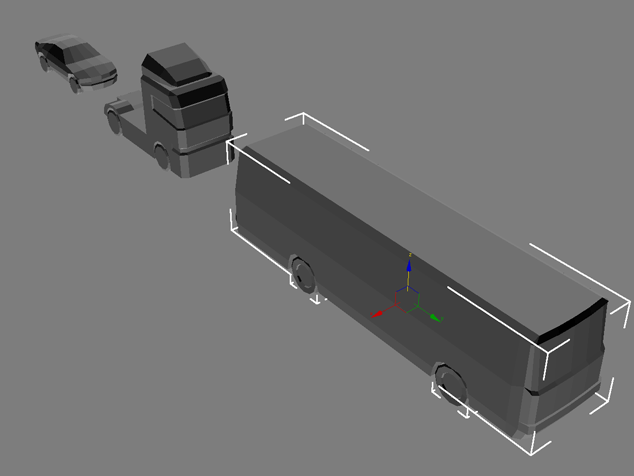
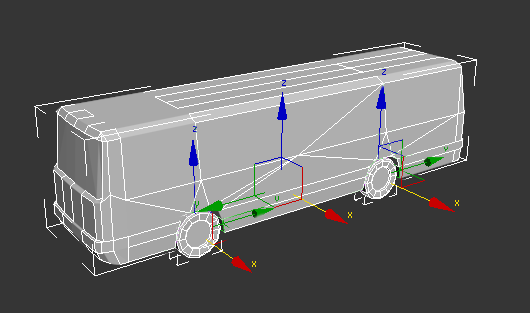
Select a vehicle; it must consist of one object of body and four or six objects of wheels. Body should be Y-axis oriented (Y-axis corresponds to forward movement of a vehicle.) Wheels should be oriented in such a way that local X-axis is outward-directed. Local axes should locate both in the center of rotation of wheels in the center of body weight of a vehicle
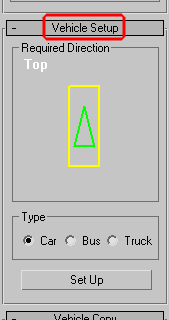
Open the Vehicle Setup section of the CityTraffic2 utility, then choose a vehicle type, i.e. a car, a bus, or a truck. Cars can park in parking areas. Buses can stop at bus stops. Trucks can only move. Once you have picked all the necessary objects and specify the vehicle type, press the Set Up button. Thus, you can customize different vehicles.
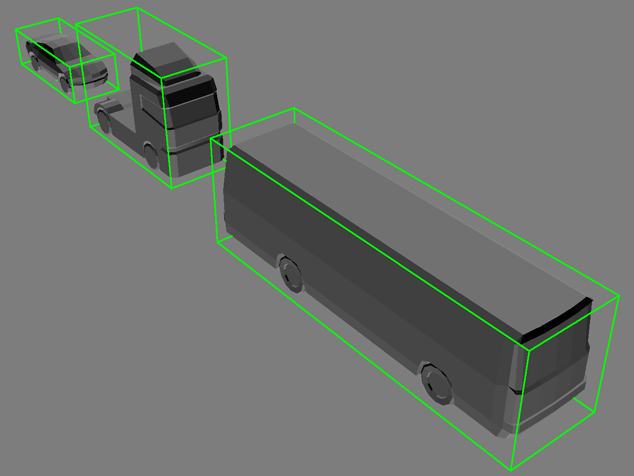
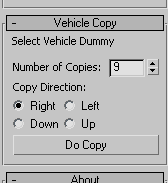
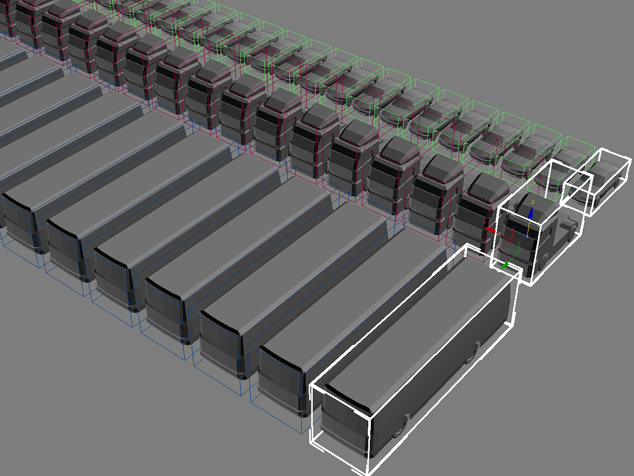
In order to multiply customized vehicles, use the Vehicle Copy section. Select a vehicle Dummy, set number of copies and a direction, and press the Do Copy button.
Vehicle Parameters

- Size - dimensions of the vehicle (IMPORTANT! need to have real world dimensions)
Behaviour:
- Acceleration - maximum acceleration
- Maneuver - maximum speed during turning (real world physics applies)
- MaxSpeed - maximum speed in straight line
- Suspension rig - suspension rigidity (affects tilting during turns)
- Bus Stop/Parking time (s) - time to stop , for bus on bus stop or car on parking bay
Vehicle Types:
- Car - usual behaviour and can enter and stop on parking bays
- Bus - tries to drive on side lines and stops at bus stops
- Lorries - tries no to drive on left lines
Step 6
Having completed all the previous steps, you can proceed to simulation.
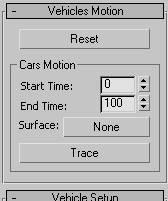
Choose Surface geometry. It should cover the whole road area, otherwise cars will fall when getting to absent parts of the roadbed.
Specify the number of the starting and the ending frames (Start time, End time). We recommend making the starting frame negative (for example, -200) to give time for acceleration and balancing of all the vehicles. Click Trace.
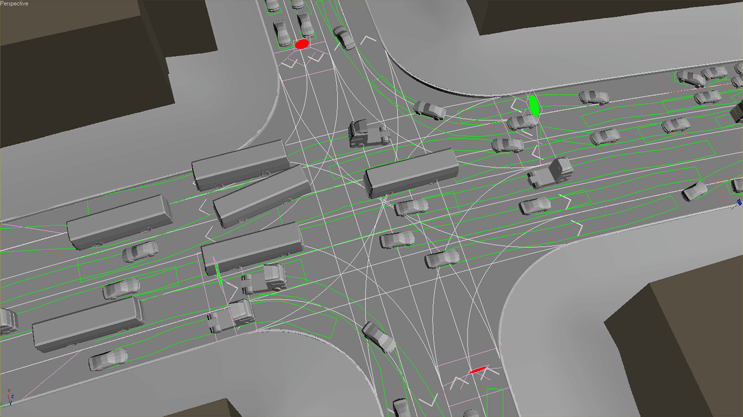
Calculation may take from a few minutes to a few hours depending on number of frames and vehicles. If you are not happy with the process, press the Reset button (this will erase all data of the calculated simulation), change all the necessary parameters, and click Trace again.
Sometimes in order to achieve required results you may need to create more vehicles than necessary, and then delete incorrectly behaving vehicles after simulation.
Baking to key frames
We recently released a baking script
Troubleshooting
Common problems
CityTraffic is based on the simulation close to real life physical properties so all dimensions and settings need to be physically correct
Some common setup problems:
- incorrect units and scale (e.g a bus cannot be 100 meters long)
- there must be a road for vehicles to drive on
- the road system need to be preferably looped
- the roads are too narrow
- pivot point is outside of the mesh
- the rig must be applied in right size and cannot be scaled
- incorrect speed parameters (of maneuver and normal speed) which are impossible to replicate in real life
you can also try our sample file
License errors
In case of license malfunction and errors (which can be caused by disk reformatting, re installation of the operating system or components replacement) you are free to address the developer at any time by sending your request for a new *.lic file to the e-mail support@icube3d.com
Other errors
Please make sure you download and install latest version from our forum and confirm that update was successful by checking version number in About panel of CityТraffic.
if this have not solved the problem please contact us at support@icube3d.com , by sending description of the problem together with the following information:
- OS version (inc 32 or 64 bit)
- 3ds max version
- some screenshots
- and file with the problem when possible