This is an old revision of the document!
Table of Contents
SplineLand Manual
SplineLand is a plugin for Autodesk 3ds Max that helps to generate topographically accurate terrains from a set of splines. Without SplineLand it is almost impossible to achieve accurate results in 3ds Max. Now you can do it quickly, in just a few clicks your topographical data can become a terrain. Splines can be topographic contours in one plane each, or they can have any arbitrary geometry. SplineLand includes the following functions:
- Creation of precise and topologically correct relief
- Possibility to use any types of splines, including open splines
- With SplineLand you can lay roads over the terrain as well as create and level areas, generate bedding and ground cuts at selected angles and heights
- Possibility to assign ID to various terrain details
- Control over grid density
Installation
System requirements
3ds Max versions: 2008, 2009, 2010, 2011, 1012, 2013, 2014 all 32 or 64 bit
3ds Max Design: all
If you use V-Ray: V-Ray 1.5 (RC5 - no animated proxy, SP1- SP6), V-Ray 2 SP1, V-Ray 2.2, V-Ray 2.3, V-Ray 2.4 - 32 or 64 bit (beta releases should also work)
OS: Windows XP, Windows Vista, Windows 7, 8 all 32 and 64 bit.
Please note:
User must have local administrator rights with Windows XP to use SplineLand.
on Windows 7 administrator rights needed only during installation
Installation
Please make sure you downloaded latest version of the plug-in from our forum.
Users are provided with the same installation file for both Workstation and Render node
SplineLand.exe
Workstation can be used only when license is properly installed, and provides access to all SplineLand options.
If SplineLand does not find license file it switches itself to Rendernode mode and only can open and render files created with MultiScatter Workstation.
Rendering is available both locally and over network.
To install the program you need to run the SplineLand.exe with the administrator rights. (In windows 7 right click “run as administrator”) even if you are logged in as admin.
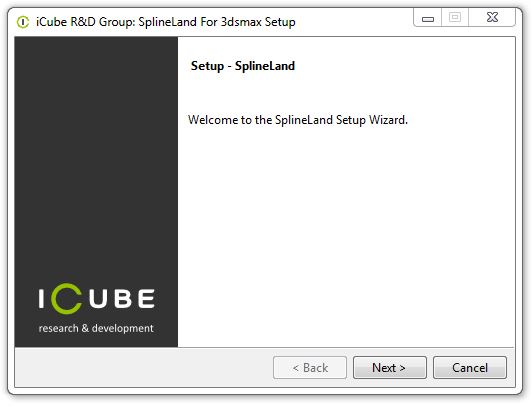
Don’t forget to quit 3ds max before you start the installation. (please check Task Manager too for any running instances of 3ds max)
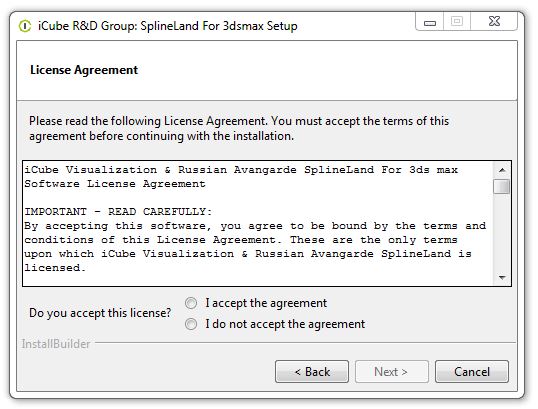
Read carefully the license agreement. If you accept it tick “I accept” and then press setup button; if not, press “Cancel” button.
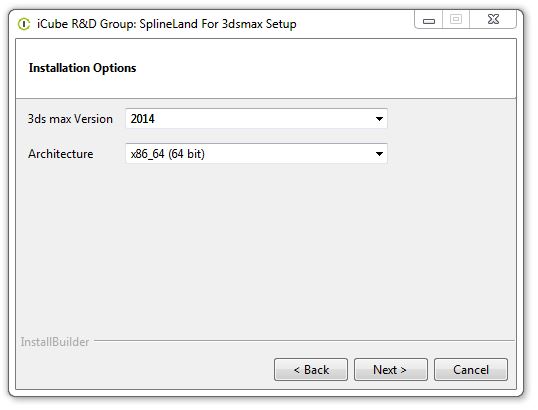
Choose 3ds max version you use.
For 3ds max 2014 please choose 2013, and manually correct the path to 2014 \Plugins folder
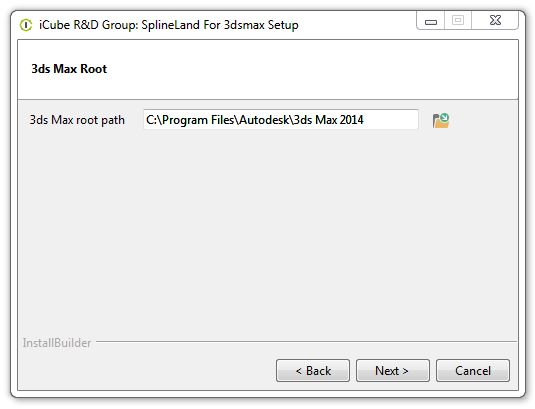
The setup wizard will automatically select destination folder for 3ds max. Check the path where 3dsmax is installed and correct it if needed.
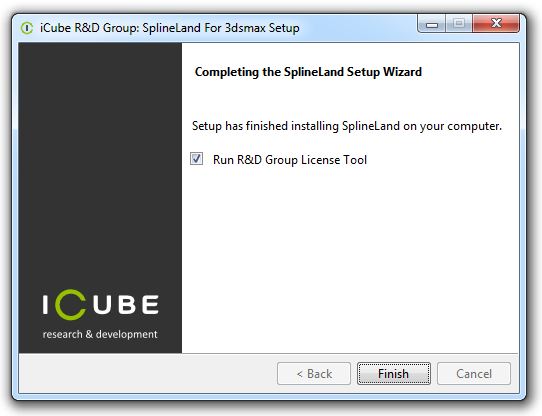
Check that no error messages in setup result window
Registration
Start the SplineLandRegistration32x.exe or SplineLandRegistration64x.exe utility (for 32-bit or 64-bit systems accordingly)
Please make sure you always use the registration utility which is supplied with the particular version of SplineLand
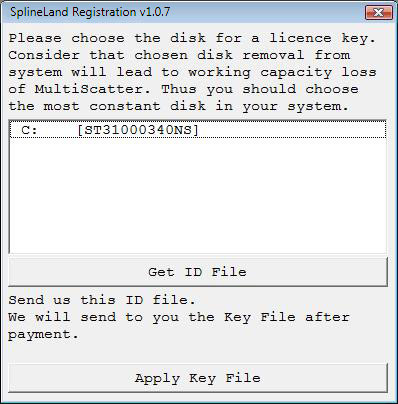
Choose the hard disk to be linked with the SplineLand license (linking with external USB storage, Flash drives and network drives is not supported).
Press the «Get Your ID File» button and save *.id file on your hard disk under any name you like.
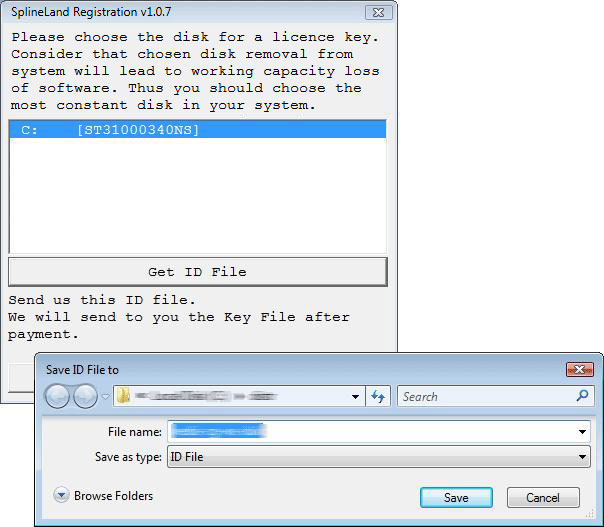
Send this file to mail@rendering.ru (or your reseller). Please attach copy of you receipt or order number to avoid any delays in communication.
In the nearest time (usually within 24 hours) you will get an email from us (or your reseller) with *.key license file attached. Save this file in convenient location. Start SplineLandRegistrationXX.exe utility again and press the «Apply Key File» button.
In the dialogue box select the *.key file you received from us. With this registration procedure is over.
In case of license malfunction errors (which can be caused by disk formatting, re-installation of the operating system or components replacement) you are free to address the developer at any time. Please make sure you download latest version from our forum and generate new *.ID file. Send it to mail@rendering.ru to get your updated *.Key file
However, we reserve the right not to issue a new license in case of total replacement of a PC if the registration request is submitted more often than once in half a year.
ATTENTION! Please always try to email from the same email address you used when you purchased the plug-in. If we can’t find your e-mail address from which you sent the ID file in our database and there is no explanation and receipt or order number in you email, your request may not be processed!
Please always attach you receipt or order number to avoid any delays in communication.
Uninstall
To uninstall SplineLand, just remove Landform.dlm from /Plugins folder in your 3ds max installation location.
Installing for network or distributed rendering
For network rendering just install the same file SplineLand.exe. Installation procedure is the same as for the Workstation, but skipping Registration process. Rendernodes do not require registration.
Submission for network or distributed rendering should be done from the PC with the registered version of SplineLand. The rest of render nodes involved in the network or distributed rendering do not need to be registered
Each SplineLand license comes with unlimited render nodes.
manual installation on render nodes:
install 1 machine with the exe file then copy following file to other rendernodes from that machine carefully (provided they are identical machines):
\plugins\Landform.dlm
Getting started
SplineLand creation
To create SplineLand go to Create>Geometry>SplineLand>SplineLand
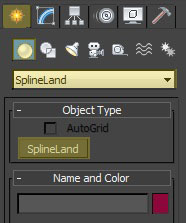
After SplineLand has been created, go to the Modify panel and select terrain modelling splines. Do not delete original versions of splines after selecting them as SplineLand. It is recommended to keep them in hidden layer.
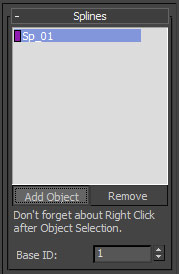
The Splines window is responsible for creation of the base for the future terrain. You can select any spline from the scene. After all required objects have been selected, right click or press the Add Object button again.
You can delete all unnecessary objects by clicking Remove. There is also a possibility to assign an ID to the basic material here, if necessary.
Creating roads and platforms
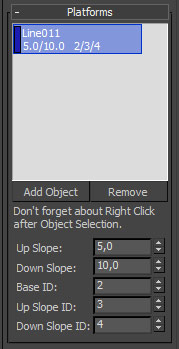
The Platforms window is responsible for creation of different paths and platforms on the terrain surface. Any geometric object can be selected for these purposes (Editable Mesh or Editable Poly). After all required objects have been selected, right click or press the Add Object button again.
You can delete all unnecessary splines by clicking Remove.
After selecting a specific platform, you can proceed to its customisation.
The Up Slope is responsible for tilting of ground cut above platform. The Down Slope is responsible for tilting of bedding course beneath platform. It is worth pointing out that the slope gradient ranges from 5 to 85 degrees. You can assign different Material IDs to platform, ground cut and bedding course.
Base ID assigns ID to horizontal plane of the platform.
Up Slope ID and Base Slope ID are responsible for assigning IDs to ground cut and bedding course, respectively.
Generating terrain
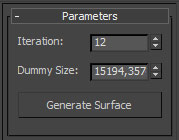
Users can set up any number of iterations, as required. However, for slower PCs it is not recommended to set the value higher than 13. Dummy size is also set up in the Parameters window.
After all splines have been arranged as required, click Generate Surface to create terrain. In case of any alterations to the original splines or platform geometry, terrain needs to be regenerated once again.
SplineLand modifier (WSM)
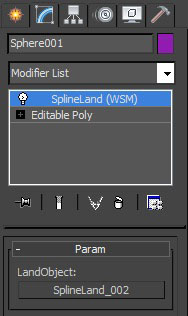
The plugin also includes the SplineLand modifier. This tool is necessary if you want to apply pre-generated terrain to any geometry. Note that terrain “duplication” is a real-time process. The modifier is rather simple in use. Select any geometry, apply the SplineLand modifier to it, and assign an object to terrain in the Param scroll.
Troubleshooting
License errors
In case of license malfunction and errors (which can be caused by disk reformatting, re installation of the operating system or components replacement) you are free to address the developer at any time by sending your request for a new *.key file to the e-mail mail@rendering.ru
However, in case of total replacement of a PC we reserve the right to not provide a new license more often than once in half a year.
Installation problems
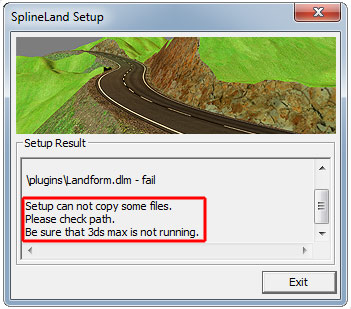
make sure 3ds max is not running, (please double check in task manager too)
make sure you are installing with administrator rights (in windows 7 right click “run as administrator” even if you are logged in as admin)
make sure you choose right path for you 3ds max version
Dll errors
- Error Loading Dlls
- Dll failed to initialize
- Error sode 126 - The specified module could not be found
please make sure you have Microsoft Visual C++ 2010 Redistributable Package 32bit or 64bit installed
Microsoft Visual C++ 2010 Redistributable Package (x86)http://www.microsoft.com/en-gb/download/details.aspx?id=5555
Microsoft Visual C++ 2010 Redistributable Package (x64) http://www.microsoft.com/en-gb/download/details.aspx?id=14632